About Me

My photo
Sewing and cooking are two of my favorite things. In the past, I often found myself searching for pictures and details of projects I have done, without success. So I decided to start documenting my creations. Then my son suggested I add my recipes to the blog so that they are documented also.

Monday, July 22, 2013

It all started with an innocent comment........

Yes, a few weeks ago I made a comment to my hubby that if my sewingroom had hardwood floors, instead of carpeting, we would no longer have to pull threads out of the beater bar of the vacuum. It really is a pain to clean the carpeting after a day of sewing; pins are hidden in the pile and threads just stick like velcro. I really did not expect to get new flooring but the next week he asked if I wanted to go to Lumber Liquidators to look for flooring. Of course I dropped everything and off we went.  We agreed on a laminated wood flooring and the work began.

 
First everything in the room had to be removed so a new paint job could be done before the new flooring went in. Before the renovation, I kept all 6 of my machines (Elna 740, Pfaff QE4, Brother 8500D, Janome 300E, Janome CoverPro 900 and Brother Project Runway Serger) out on tables and the room was always cluttered. So I offhandedly mentioned that it would be nice to have shelves to hold 4 of them and as they say, ask and ye shall receive! Not only did my husband make sturdy shelves but I have bins beneath them to hold my fabric and a nice shelf on top to hold my batting.  It is all so nice and neat.


Every piece of furniture in the room has a story. Since I sew on the Pfaff QE4 and the Elna 740 all the time they are set out permanently. I have my Elna resting on my Mom's Singer cabinet that holds the 1950 Singer that I learned to sew on.  I quilted the cover on the bench. 


 The QE4 rests on my husband's grandfather's desk and allows a large surface for my articles that I am sewing. This has proven to be a comfortable layout.


To the right of the cutting table I have my ironing board and pegboard on the wall holding all my tools. It is so nice to be able to locate my tools when I need them.


In front of my machines on the far wall I have a green bookcase holding my sewing books, thread and fabrics. This bookcase is from my childhood home and it held the volumes of Encyclopedia Britannica's that I used to read and use for research long before the computer age.  I have a small TV ontop of the bookcase that I can easily see when I am sewing.
 
 
Sitting beside the bookcase is my parents chest of drawers from their original bedroom set.  About 35 years ago my husband and I arrived at my parents house and it was on the burn pile.  We rescued it and have used it ever since. 
 
My husband made me a project board and hung it on the wall beside my machines.  I made the valences and ironing board cover from cute ruler fabric I found it a local quilt shop. 
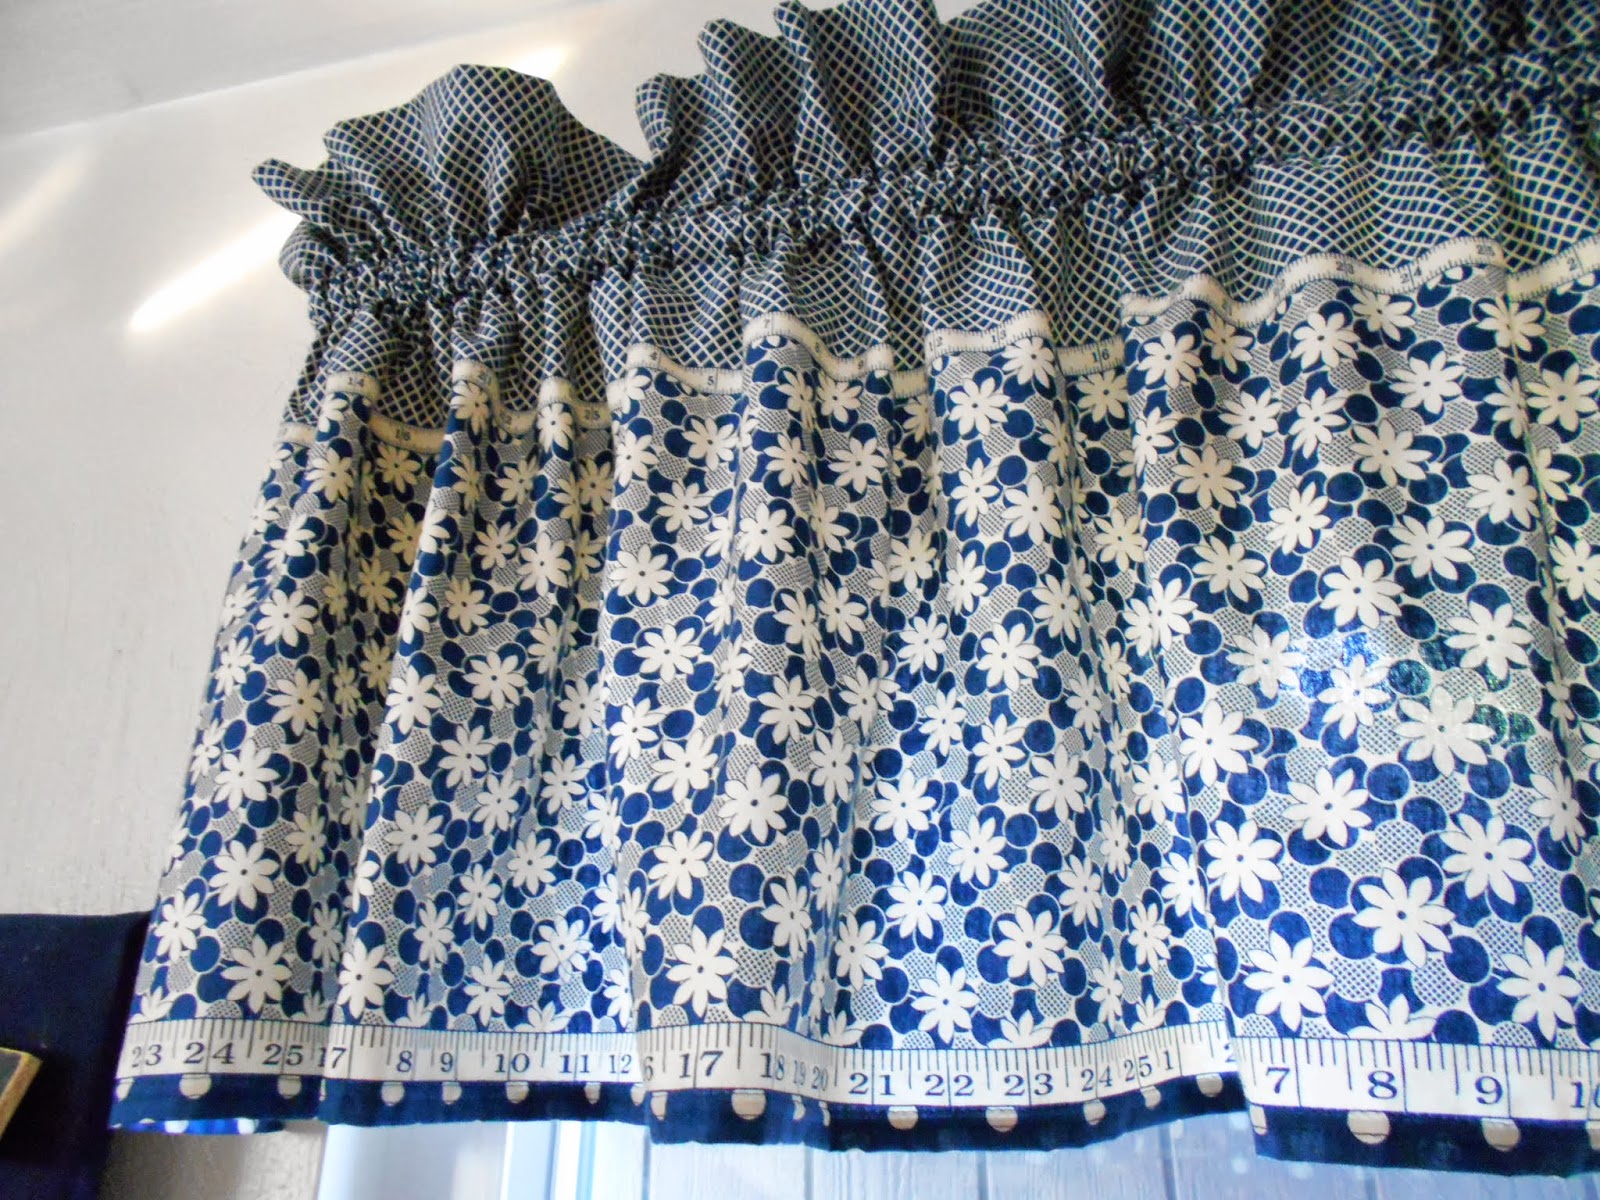


So I am in love with my new layout and have found that it is much easier to sew with less clutter.  In the last week or so I have managed to keep it clean by putting everything back on the pegboard when I am done with it.  But best of all, each evening I just run the dry duster across the floor and all the stray threads and pins are picked up in one fell swoop. I knew all I needed was a hardwood floor!


Monday, June 17, 2013

Father's Day Weekend


We spent the Father's Day Weekend camping with our children.  Nothing is more special than 8 adults in a motorhome! Seriously it was a great weekend. We had 2 tents set up for sleeping so there were only 4 of us in the motorhome.  This was our 2nd Annual Papapalooza.  Joining us for the second year in a row were 2 couples, friends of our eldest Bill, and their 4 children. Since we have no grandchildren we need to borrow them. This really works out well because we get to watch them play with frogs but have no responsibility for their behavior. These kids can really catch frogs much to my amazement.

One of the highlights of the weekend was tie dyeing shirts, shown above. 21 shirts were created with help of the children. I actually went golfing during this activity but they did a great job. My daughter-in-law Sharon designed the shirt and led the tie dyeing effort and was joined by our other daughter-in-law Tara. As you can the results were pretty professional.  When we returned from a day of golf none of the children had multicolored hands so I can only assume gloves were worn by all.

Our daughter Michelle managed to win the golf bet with her brother Jimmy on both days of golfing. Was she a sandbagger; I do not know but she was a winner.  I fear this competition may go on for years to come.

Fishing was an activity for all frequently as we were parked at the edge of the lake. This allowed the children to wade in and catch those frogs without the adults ever having to move from their perches. Many fish were caught and released.


What I have learned in the last few years is that as much as I adored my children when they were young, I absolutely love them as adults. There is no better times for me and hubby than the times spent with all our children together. So we cannot wait until next year for the 3rd Annual Papapalooza!!

Friday, May 10, 2013

Made My Own Tortilla Salad Shells


So a few years ago I bought 2 pans to make tortilla shells  but had never used them.   Since I was making al the fixings for soft tacos I went searching for them.  I found them packed away in the basement and no longer had any instructions with them. After searching on the Internet I decided I should bake them for 15 minutes at 375 degrees.


Since my flour tortillas had been stored in the refrigerator, I wrapped them in a wet tea towel and zapped them for 30 seconds to make them pliable.  Then I put them into the tortilla pan pushing them into the crevices. I placed them into the preheated oven for 15 minutes and they were slightly browned. I figure baking them has to be healthier than the fried shells you get when dining out.


I filled my shell with lettuce, tomatoes, shredded cheddar cheese, hot refried beans, taco flavored ground meat and finished it all off with a dollup of sour cream and two spoonfuls of salsa. It was a delicious salad and I ate every last bit of the shell!

Sunday, May 5, 2013

Variations of Bright Hope Design


Above is a baby quilt I made from the Bright Hope Design pattern I have written about previously. In the post Two Sided Binding I have a picture of the lap quilt variation I designed from it.  Below is a baby quilt made by Maureen in a class that I taught using this pattern. I have found this pattern to be so versatile.

 
On both of these baby quilts we did a self binding.  We used the Quick Easy Mitred Binding Tool http://www.sewbizmarion.com/shop/Quilting-Tools/p/Quick-Easy-Mitered-BINDING-Tool.htm.  This is the first time I did a self binding using the backing fabric and I must say that it is worth every penny you pay for the template. The mitre is perfect every time. I used the edge joining foot to sew the front in place and it is very even.


Bridal Shower Gifts


For a recent bridal shower I made a fanblade table topper and coasters to match.  Then I bought a lovely bowl to place in the center of the topper.  I also like to always add the bride and groom's name to an item so I embroidered 2 kitchen towels with their names stacked on their last initial. The topper is made from the pattern I wrote about earlier in AQS Quilt Show and the fabric I used I had bought at Burkholders in Denver, PA that I visited during that trip.


Here is a pic of the lovely bride and her bridesmaids.


Monday, April 8, 2013

Using Up That Fabric Stash


I had this lovely floral linen fabric sitting in my stash for some time now; maybe two years or so, and decided to make a sleeveless summer dress in anticipation of some nice weather. I chose a Simplicity pattern #4552, View A, that I also had bought some time ago but have never used.
 
 
  Cutting the proper size is always a mystery with patterns. In Ready To Wear, I wear a size 10 or 12, but in the pattern world, I can make anywhere from a size 12 to a size 16.  So my measurements would correlate with a size 16 on the pattern envelope but when I looked at the ease measurements, I realized that a 16 would be huge on me.  I settled on cutting a size 12 for the neck and armholes and a size 14 on the side seams.  This pattern is really easy to sew and is a snap once you decide on your cutting lines. My fabric had a border so I tried to line it up with my hem.  Unfortunately I still needed to cut off another 2 inches to make it mid knee.  I had originally cut off 2 inches from the pattern hem initially since I am only 5'2". The neckline and armhole edges are made with a fabric strip that you cut on the bias.  I chose to use my coverstitch on these edges once I turned the strip in. This makes a really nice finished edge.


Thursday, March 28, 2013

Sewing with Friends


There is nothing more memorable than a day of sewing with friends.  My friend Renee had been given a soiled and tattered quilt that had been made by her sister-in-law's grandmother and she wanted it repaired to give to her daughter. It definitely had been a utility quilt that looked like it had been made from possibly an old sheet and a blanket. After she spent months trying to get inspiration, I showed her a quilt I had made from the Bright Hope Design which had embroidery machine appliqued flowers on it. She decided that it was exactly what the fabrics needed. So she saved what she could of the threadbare original and bought some coordinating fabrics. In the photo below, the original fabrics are the light blocks that have green and blue large floral designs on them and the center green block. The colors were hard to match since they were so faded but the dark blue made the design pop. The binding will be done in this blue so it will pull it all together.


We used scraps form the blocks to make the appliqued flowers. We had 3 embroidery machines set up in my sewing room and were able to make the 16 appliqued blocks in under 2 hours.

 
At the same time, we had 3 sewing machines set up in my dining room to sew the blocks and rows together.


It is amazing that in about 5 hours, we were able to make an entire quilt top plus we did stop for a great lunch from Panera's also. I am thinking that I would like to make all my quilt tops this way since it goes so much faster.

The end result is a quilt top that weaves together remnants of a family's heritage into a new design that employs old and new techniques that will last for many generations to come.

Thursday, March 21, 2013

AQS Quilt Show


Last weekend I attended the American Quilt Society Quilt Show in Lancaster, PA.  The day spent at the show was both exhausting and enjoyable. I was in need of some new patterns so the three floors of vendors allowed me to prowl many vendors before deciding which patterns to buy. The best part of this search was getting to talk to some of the pattern designers. My favorite was Laura Blanchard with Plum Tree Quilts. We so enjoyed talking with Laura and her husband and ended up buying 4 patterns from her.  The patterns are relatively simple but the blocks can be set in different layouts so one pattern can make several quilts with varying designs. From Plum Tree Quilts I got the Kaleidoscope, Center Court, and Two by Two quilt patterns and the Glory runner and placemat pattern. I also got a crib quilt pattern from Starr Design Fabrics that uses graduated colors and has prairie points on the border.

My friends and I also visited many quilt shops in the area.  Honestly I have never been to one area that had so many large quilt shops. The good part of this is that the prices are lower due to the competition. The Batiks were everywhere and so many of them. A few of my favorites shops were The Old Country Store in Intercourse, Burkholders in Denver, Sylvia's and Weaver's Dry Goods in Lititz.

Another aspect was getting to see the many hand made items for sale, mostly made by the Amish. It was good to see that they attach a suitable price for most items.  It takes so much time to make the items that I hate to see them being sold at a low price because this devalues their work.

When I got home on Sunday, I went through my purchases and knew I had to make something on Monday. I chose the pattern for a Fanblade Table Topper, shown above. It was an easy topper to make and I plan to make several more. I free motion quilted the blades after it was all pieced together.
One of my other purchases at the show was pounce and several pounce design sheets from Full Line Stencils. I have never used pounce so I tried one of the linear designs on the dark blades. I discovered that following a marked design is actually very different than FMQ. The trick is to go slower and have your eye on the design ahead of the needle. I am going to need quite a bit of practice to get the hang of it.


Tuesday, March 12, 2013

My Latest Baby Shower Gifts


I made this Elephant baby quilt for a baby shower this past weekend.  The colors of the room are yellow and gray so I used that color combination. I used 2 different machine applique elephants and when I did the quilting I echo quilted around the elephants. On the border, my favorite part, I meandered. The gender of the baby was not known so I tried to stay with yellow, purple and green.  I used the Bright Hope baby quilt pattern from Smith Designs. 
 A few weeks ago I attended a class given by a Pfaff educator and she demonstrated how to use the Sensormatic Echo Free motion foot; I bought it that day knowing that I was going to use it for the elephants. It was really easy to use to quilt around an object.  I actually have the same foot for my Elna and did not know the technique for using it properly.
 
 
I also made some burp cloths in the same manner as my tutorial Burp Cloths shown earlier on my blog. These are made with diapers and flannel.


Saturday, February 16, 2013

Making Burp Cloths


I have been making personalized burp cloths, see my  Previous Post, for awhile and I really like the ones I do with diapers and I think they are more absorbent.  But every time I need to make another one I have to dig out my scribbled notes.  So I have decided to write a tutorial and not have to go through the search and discovery method each time.


Supplies:

Diaper - wash and dry.  The diaper should measure 17 inches in length so sometimes I have to cut.   It will not be 15 inches wide; that is ok because you want it to be smaller in width.
Flannel - 17 inch X 15 inch (I wash in hot water and dry on hot prior to construction)


So the first thing I do is embroider on the front of the diaper in the top 1/3 in center. I use medium weight tear-a-way stabilizer.

 
Next I lay the flannel right side up and lay the  diaper right side down on top of it.  I line up the left sides and sew a 1/4 inch seam. Remember the length of the flannel and diaper should be the same but not the width.
 
 
Next I line up the right sides and sew a 1/4 inch seam.  I want to have the flannel showing on both sides of the front so the width of the flannel is larger than the width of the diaper.
 

For the top seam I line up the raw edges with the flannel extending an inch or so on both sides. I just make it extend equally on both sides. and sew the top seam.

 
Sew the bottom seam last leaving an opening to turn right side out.  Before turning clip the four corners. Once turned sew a zigzag or decorative stitch around the perimeter.


Monday, January 28, 2013

Two Sided Binding

Once in awhile I am binding a quilt or runner and cannot decide on the binding because my fabric just doesn't coordinate with the backing and the front.  So today I had this quandary and decided to make a two sided binding.  I only do this occasionally so I decided to make a tutorial for myself because it took me all morning to get it right. I also made a sample for myself to hang on my peg board for the next time.  The front of the binding matches one of the batiks used and the back binding matches the backing.


Cutting the binding strips.
 
I sew my binding onto the back so that when it is flipped to the front I can machine stitch on the front so these directions will follow the procedure I use.
 
Front binding strips are cut to 1 5/8 inch. You will need enough strips to match the lengths of the sides and top and bottom. Each side,  top and bottom are sewn on separately. This 1 5/8 inch strip is folded in half, wrong sides together and pressed.


Back binding strips are cut to 1 1/8 inch. This strip is not folded.
 
 
The front and back binding strips are sewn together by matching raw edges, right sides together, of the folded front binding and the back binding (unfolded), as shown below using a 1/4 inch seam.  Once sewn together, the 1/4 inch seam should be pressed open.


Now sew the binding to both long sides first.  Place the right side of the 1 1/8 inch strip to the right side of the back of the quilt.  Sew in a full 1/4 inch seam; do not use a scant 1/4 inch.
 
 
Press up from the backing side.
 
 
Now turn to the front and sew with an Edge Joining Foot/Stitch in Ditch Foot with the needle moved to 1.3 to right of guide. Trim even with the top and bottom.


Now sew the top strip onto the back leaving about an extra 1/2 inch at both sides. When you flip to the front, before sewing onto the front, turn the extra 1/2 inch in to cover the raw edge. Do the same for the bottom and your binding is complete.


The binding will look great from the front and the back and lay flat.